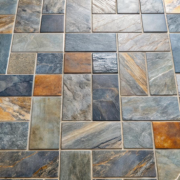
If you’re considering taking on a DIY project and laying tile in your home, you may feel intimidated and overwhelmed by the complexity of the task. Don’t worry! With the proper preparation, knowledge, and tools, laying tile can be a rewarding and successful experience. In this blog post, we’ll provide you with all the essential information you need to know to ensure your tile project succeeds.
Tools and materials
Laying tile can be a rewarding DIY project, but having the right tools and materials is important. To ensure your project is successful, make sure you have the following:
- Tile: Select the type and size that best suits your project. Some popular tile options are ceramic, porcelain, and stone.
- Adhesive: Depending on the type of tile you’re using, select a tile adhesive that is compatible with it.
- Grout: Once the tile is in place, grout will be necessary to fill the gaps between each tile. Make sure you select a grout compatible with the type of tile you’re using. You may need help extra help on things such as determining what color grout to use with white tile. Be sure to do your research and ask the tile company for suggestions.
- Tools: You’ll need specific tools to complete this project, including a tape measure, chalk line, trowel, wet saw, and grout float. You may also need a rubber mallet and spacers to help keep the tiles even during installation.
Measuring and marking the tile
Before laying the tile, it’s important to measure and mark the area you’ll be tiling. Start by measuring the space and determining how many tiles you will need. Once you know the tile required, you can begin marking your area. Using a ruler and pencil, mark out a square or rectangle in the shape of your desired tiling space.
If you’re looking to lay tiles in a specific pattern, measuring and marking the exact center of the area is important. This will help ensure your pattern is symmetrical and centered. Once everything is marked out, you can begin cutting the tile for your project.
Cutting the tile
Before cutting the tile:
- Take a few moments to lay out and double-check your measurements to ensure each tile fits properly. If you’re going to be making any cuts, make sure to have your safety glasses and gloves on at all times.
- If you’re using a manual tile cutter, draw the cut lines on the back of the tile with a marker or felt-tipped pen.
- Leave enough room around the edges for grout and allow for any imperfections in the cut line.
- Place the tile on the cutting bed of the tile cutter, and press it down firmly.
- Use the lever to cut through the tile.
If you’re using an electric wet saw, make sure that you’re wearing safety glasses and gloves before proceeding. Again, draw the cut lines on the back of the tile and place it firmly onto the cutting bed. Once everything is in place, turn on the wet saw and cut.
Keep a steady hand and move slowly to get a clean cut. After you’ve finished cutting all your tiles, wipe off any dust or debris that may have accumulated during the process. Then, proceed with laying the tiles and applying grout.
Applying the adhesive
One of the most important steps when laying tile is applying the adhesive. The type of adhesive you use will depend on the kind of tiles you’re using and the surface you’re working with.
To get started, make sure you have the appropriate tools and materials ready. You’ll need a notched trowel to spread the adhesive evenly, a small bucket to mix the adhesive, a sponge to clean up any excess adhesive, and a damp cloth for any last-minute touches.
Once you have all your supplies gathered, mix the adhesive according to the manufacturer’s instructions. Depending on the product, this can take anywhere from 10-15 minutes. Once the adhesive is mixed, use the notched trowel to apply it to the surface.
Hold the trowel at a 45-degree angle and press firmly while pulling it back over the surface in an even motion. The grooves in the trowel will help ensure the adhesive is evenly distributed.
After you have applied the adhesive:
- Wait approximately 15 minutes until it has set before laying down the tile.
- As you apply each tile, press down firmly and immediately wipe away any excess adhesive to avoid staining your tile. Use a damp cloth or sponge to clean up any excess adhesive before laying down the tile.
Applying the adhesive can be easily done with the right tools and supplies. Following these instructions will help ensure your project is successful and that your tiles properly adhere to the surface.
Laying the tile
Once the area is marked, and the adhesive is applied, it’s time to lay the tile. Begin at one corner of the area and start to lay the tiles, one by one, making sure that each tile is pressed firmly into the adhesive. If you are using a specialized tile cutter, use it to trim the edges of the tiles if needed.
Take care to maintain the same gap between each tile. When you come to a wall or other obstacle, you will need to make cuts in the tiles to fit them around these obstacles. If you have a wet saw, this can be done with ease. If you need help, you may need to score and snap the tiles by hand.
Once all the tiles have been laid, press each tile firmly with your hands. This will ensure that the adhesive adheres properly to the back of each tile. Take care to make sure that all of the tiles are level and that there are no gaps between them. After laying all the tiles, let them sit for 24 hours before grouting.
Applying the grout
Once the tiles are laid, it’s time to apply the grout. This can be tricky if you’re not used to working with tiles. To get started:
- Mix your grout according to the manufacturer’s instructions and spread it with a rubber trowel over the tiles.
- As you apply, press the grout into the joints between the tiles.
- When the grout is evenly distributed, use a damp sponge to remove excess and smooth the surface.
Next, use a soft cloth or towel to remove any remaining grout residue. When finished, immediately clean your tools and materials, as grout can be challenging to remove when it dries. Finally, let your grouted tile sit for at least 24 hours before using it.
Grouting can be tricky, but you can lay your tile like a pro with practice and patience!


Comments